MW Documents Repository - a Digital Filing Cabinet
Basic Set-up for Mindwatering Custom Apps
The 2.0 version completes the addition of web management interface and added full functionality to file documents using a web browser.
The 2.0a version also adds filing logic.
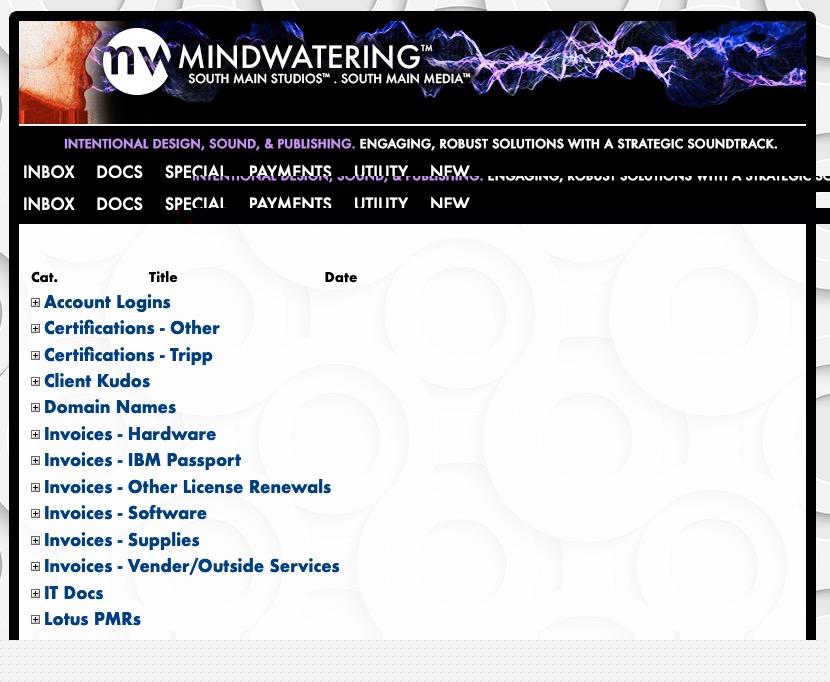
Web browser view of the Documents by Category.
Installation of the Mindwatering Documents Repository:
1. Application Set-up
Application set-up is same as in the previous releases. To implement this application, you must add it to either a Notes Client or a Domino Server. These instructions assume a Domino server.
Note: The installment steps assume you have administrator access to your Domino app server.
-- Option 1: Use a local replica of an existing app to create a empty copy.
a. Create a copy of the application (NSF) onto the Domino server.
Option 1:
- Open the app locally in the Notes client on the local Mac or PC workstation.
- Create a new copy on the Domino server.
Note: This only works if you are allowed to do so by your administrator. We are assuming you are the administrator.
- File --> Application --> New Copy
- Choose the server. Update the app Title and file name / location as desired. Make sure you have the radio button set to copy Application Design Only, and NOT design and documents.
- Click OK
b. Sign the app.
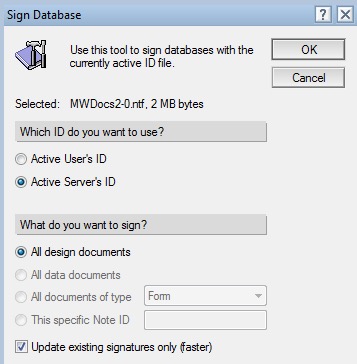
- Using the Administrator client, switch to Domino server used in the step above, and change to the Files tab, locate the new application and sign it.

Right click --> Sign --> Choose server and check the faster option.

-- Option 2: Use the application 2.0 template (NTF) and create a replica or copy on the Domino server.
a. Open the template locally in the Notes client or Domino Administrator client.
- Open the app locally in the Notes client on the local Mac or PC workstation. Double click it in your Downloads folder or other folder location.
- This will load the About this Application page, as well. You can close this tab if desired.
b. Create a new replica of the template on the Domino server.
- File --> Replication --> New Replica
- Choose the Domino application server. Update the folder location and filename as desired.
- Click OK
c. Sign the app.
- Using the Administrator client, switch to Domino server used in the step above, and change to the Files tab, locate the new template and sign it.

Right click --> Sign --> Choose server and check the faster option.
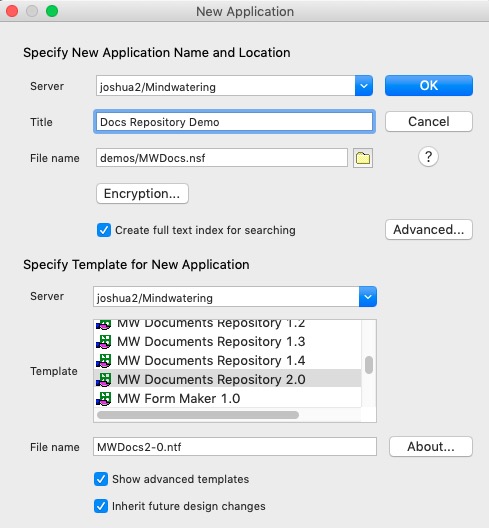
d. Create the new Documents Repository application from the template.
To create the application from the template,
- File --> Application --> New
- Under Specify New application Name and Location, Select the application Server, enter the app Title, select the folder and add the File name.
- Under Specify Template for New Application, Select the Server for the template location, and click the Show advanced templates check-box. Select the template, MW Documents Repository 2.0.
2. Application access (ACL) set-up on the server.
About roles:
The application has multiple roles: [admin], [er] , [inv], [po], [reimb], [sp], and [staff].
The staff role gives users ability to maintain all the memos and the main document repository views in the application.
The admin role gives additional ability for business owner users to the utility section of the application of repository categories, inventory categories, and auto-reply set-up.
The rest of the roles are for specific access to individual types of repository documents.
- er = Equip. Loss Reports
- inv = Inventory Documents
- po = Purchase Orders
- reimb = Reimbursements to / from the Company
- sp = Service / Vendor Payments

Make the following ACL changes:
- Give the LocalDomainAdmins and LocalDomainServers groups all roles and Manager access with all privileges.
- Give the average user of the app the role(s) needed to create documents in the repository.
- Add the user Anonymous and give the access of "No Access".
- Change the -Default- user entry to "No Access" or "Reader" depending on your corporate standards of access for all users.
Close and re-open the app or IBM Notes client(s) to experience the update access settings.
3. Create Document Categories for filing your documents.
Note: The instructions below give you the steps for Notes client or web browser.
Notes Client:
- Under Utilities, select the Documents Categories view.
- Click the New Category button.
a. Complete the Name field with a group or type of newsletters.
b. Choose the Sort number desired.
c. In the Auto Filing Matches field, add any phrases you wish to auto file documents e-mailed or pasted into the in-box folder of the document repository app. They work like @Contains.
d. Click Save. Click Close.
Web Browser:
- On the main menu, hover over New, and from the list below New, choose Document Category.
a. Complete the Category name field with a unique category name.
b. Choose the Sort number desired.
c. In the Auto Filing Matches field, add any phrases you wish to auto file documents e-mailed or pasted into the in-box folder of the document repository app. They work like @Contains.
d. Click Save.
4. Create Inventory Categories
Notes Client:
- Under Utilities, select the Inventory Categories view.
- Click the New Category button.
a. Complete the Name field with a group or type of newsletters.
b. Choose the Sort number desired.
c. Click Save.
d. Click Close.
Web Browser:
- On the main menu, hover over New, and from the list below New, choose Inventory Category.
a. Complete the Category name field with a unique category name.
b. Choose the Sort number desired.
c. Click Save.
5. Set-up the Repository In-box and the app's Auto-Reply
There are two parts to set-up. One is within the application. The other is a mail-in record in the server's Domino Directory.
a. Mail-in Document creation in the Domino Directory
- Domino Administrator client --> Domino app Server --> People & Groups tab --> Corporate (main) Directory --> Mail-in Databases and Resources
- Click Add Mail-in Database record.
Under Basics:
-- Enter an unique Mail-in name (e.g. Corp Docs).
-- Enter a description for internal administrative use (e.g. Mail-in for auto-filing digital documents received by employees for the digital filing cabinet)
-- (Optional) Set an external e-mail address for the application.
Under Location:
-- Unless necessary, take the defaulted Domain value.
-- Select the Domino app server in step 1 above.
-- Enter the path (folder/filename.nsf) using the path in step 1 above.
- Click Save & Close.
Notes:
Once the Router updates its configuration automatically (around 15 minutes), users will be able to forward e-mails to the repository. Mail rules can also be made or organization-wide filing directly from the Domino router by adding that a copy be sent to the Main-in name.
To make the server learn of the new mail-in document, issue the command "tell router update config" on the Domino console.
Documents forwarded / sent to the documents repository app will display in the In-box.
b. Application User Auto-Reply Setup
Note:
As of 2.0a, user auto replies are done with the Notes or Admin client, rather than a web browser.
Return to the new repository app,
- Under Utilities, select Auto-Reply Setup.
- Click the New Auto-Reply Setup button.
- Enter the Name of the person being set-up, set-up the desired Subject and Save the new setup document.
Notes:
For documents not matching an auto-filing category entry, they must be filed manually.
Using the Mindwatering Documents Repository:
1. Repository Documents:
E-mails are received as they are sent by the users into the document repository or by mail-rules set by a Domino administrator. Emails are auto-filed within an hour of being received. In other words, the filing agent runs hourly. Ideally, all documents coming in would have subjects that are unique enough to facilitate auto-filing.
Documents not filed automatically must be filed by someone manually who has the [staff] role to the repository app. For staff using the Notes client, the filing has multiple pop-ups which give greater flexibility when filing, but involve extra clicks for that complexity. For staff using a web browser, staff select documents/emails, select a category and file the documents selected, and therefore, cannot update subject/date metadata during filing.
Notes Client:
In the app side menu, choose Inbox. Select one or more documents, click the File button. Next there will be a couple pop-up options to choose whether to update meta-data, and then choose the category location w/in the repository for EACH document/memo being filed.

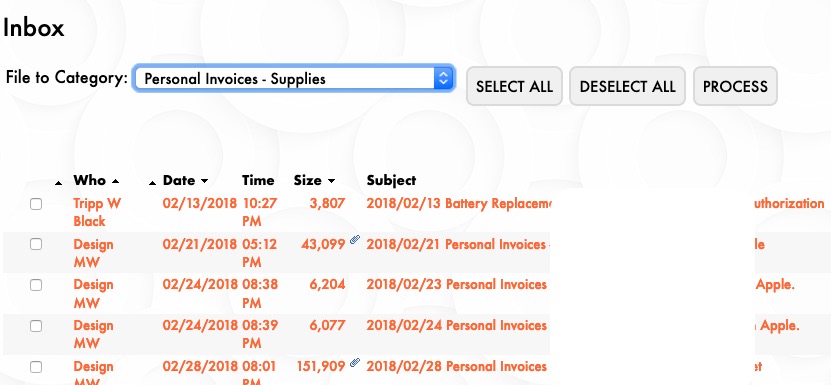
Web Browser:
Select Inbox from the main menu, and choose target category from the Files to Category list.
Next, check the checkbox next to the documents to file and click the Process button.
2. Special Document Types:
The application includes various common specialized document types for the small and mid-size business.
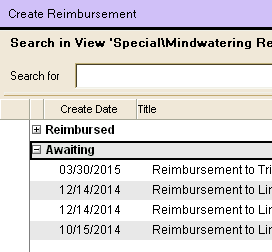
3. Reimbursements
Reimbursements are for recording reimbursements to or from the Company to the employees.
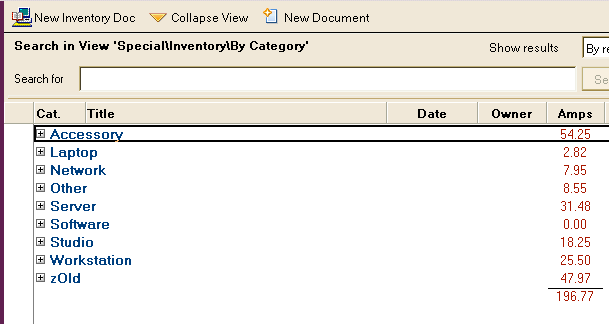
4. Inventory Documents
Inventory Documents allow you to simply inventory assets. Includes power consumption for either load calculations on back-up power or LEED type power calculations. Regular respository documents can also be converted one-way into an Inventory document, as well.
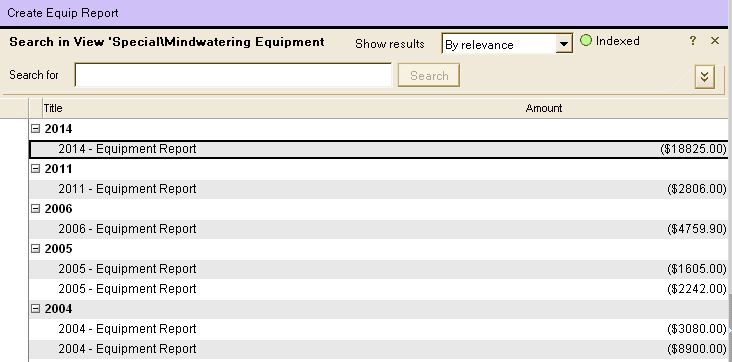
5. Equipment Loss Reports
Equipment Reports let you list for accounting purposes equipment bought each year or trash/sold each year.
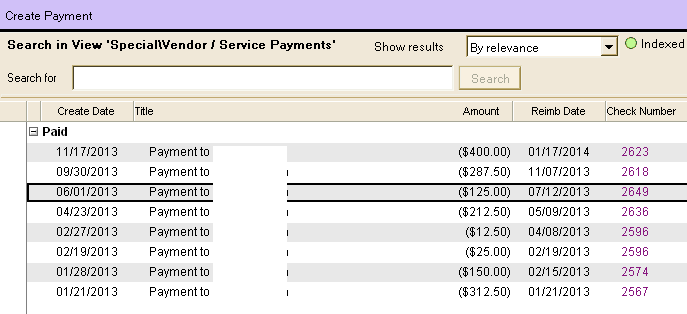
6. Service / Vendor Payments
Service and Vendor Payments are used to track / record payments to contractors or vendors.
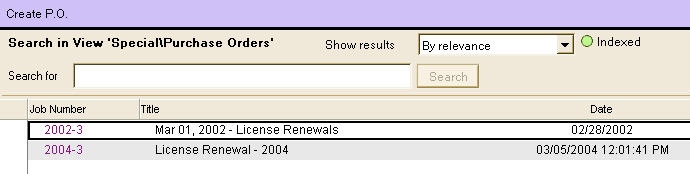
7. Purchase Orders
Allows you to create P.O.s for companies that require one for you to buy or sell something with them.
previous page
|