This instructions assume version Adobe Photosop 5 or 5.5.
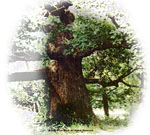
This images was used in creating this help document.
Feel free to download it for practice with these instructions.
1. Start Adobe Photoshop
2. Open the image to be resized.
Note:
If shrinking an image significantly, a full-color jpg will reduce with better results than a GIF with a limited color set.
The image should be color corrected and cropped to its final format.
You should save a version of this image in its original size in case you need to revert back to it.
3. From the menu bar, select...
Image --> Image Size...
4. Confirm the folowing settings:
Unless you want to warp the image, make sure that "Constrain Proportions" is checked (on).
Confirm that the "Resample Image" is checked (on). We use the "Bicubic" option.
Usually images are being reduced to a certain size so confirm the top "Pixel Dimensions" are in the "Pixels" format.
5. Type in either the new horizontal or vertical width in pixels.
Standard sizes are 100 to 150 for a thumbnail and 275 to 400 for an inline (embeded) image)
example of thumbnail image:
(150pixels)
example of body area image:
(300 pixels)

Note:
Drop the resolution in a big step rather than a bunch of little steps. It helps the image to not pixalize and fuzz as badly.
If this is a thumbnail in a catalog or this image is part of a row, you almost always set the images to the same width so that the distance between them is even. If you want the image to be square, you either need to crop the image after you resize it to square or before you resize it.
6: Run the "Unsharp Mask" filter to tight the image back up.
From the menu bar, select....
Filter --> Sharpen --> Unsharp Mask...
Note:
Take care how high you crank the "Amount" setting. If to high you give the edges a fake outlined harshness.
Around 20 is sufficient for thumbnails and around 12 is sufficient for inline images if original size was about 600 pixels wide.
7. Save the document.
If the image is clip art or line art, or single color text, save it it GIF format reducing the colors as far as possible without loosing fidelity.
If the image is a full-color photo or clip art, save it in JPG format with some compression for file size reduction. Take care reducing past 6 in the quality scale.
You can e-mail design@mindwatering.com if you have comments or feedback on this tip.
previous page
|