Task:
Set-up online meeting integration between Notes and an Online/Virtual Meeting Host. (e.g. Sametime, Zoom, MS Teams, GoToMeeting, and/or Webex).
In this example, we'll set-up the Zoom integration.
Steps for Zoom Online Meetings Integration:
1. Open Mail or Calendar view and create a New Meeting:
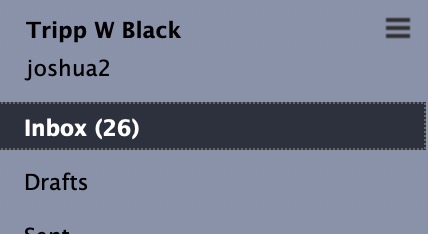
Start Notes -->

Mail icon (bookmark bar or workspace icon, etc) -->

Inbox (folder) -->
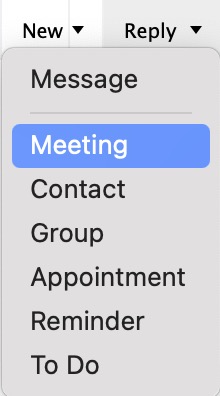
At the top of the Inbox folder, click New (button dropdown) and select Meeting (sub Action)
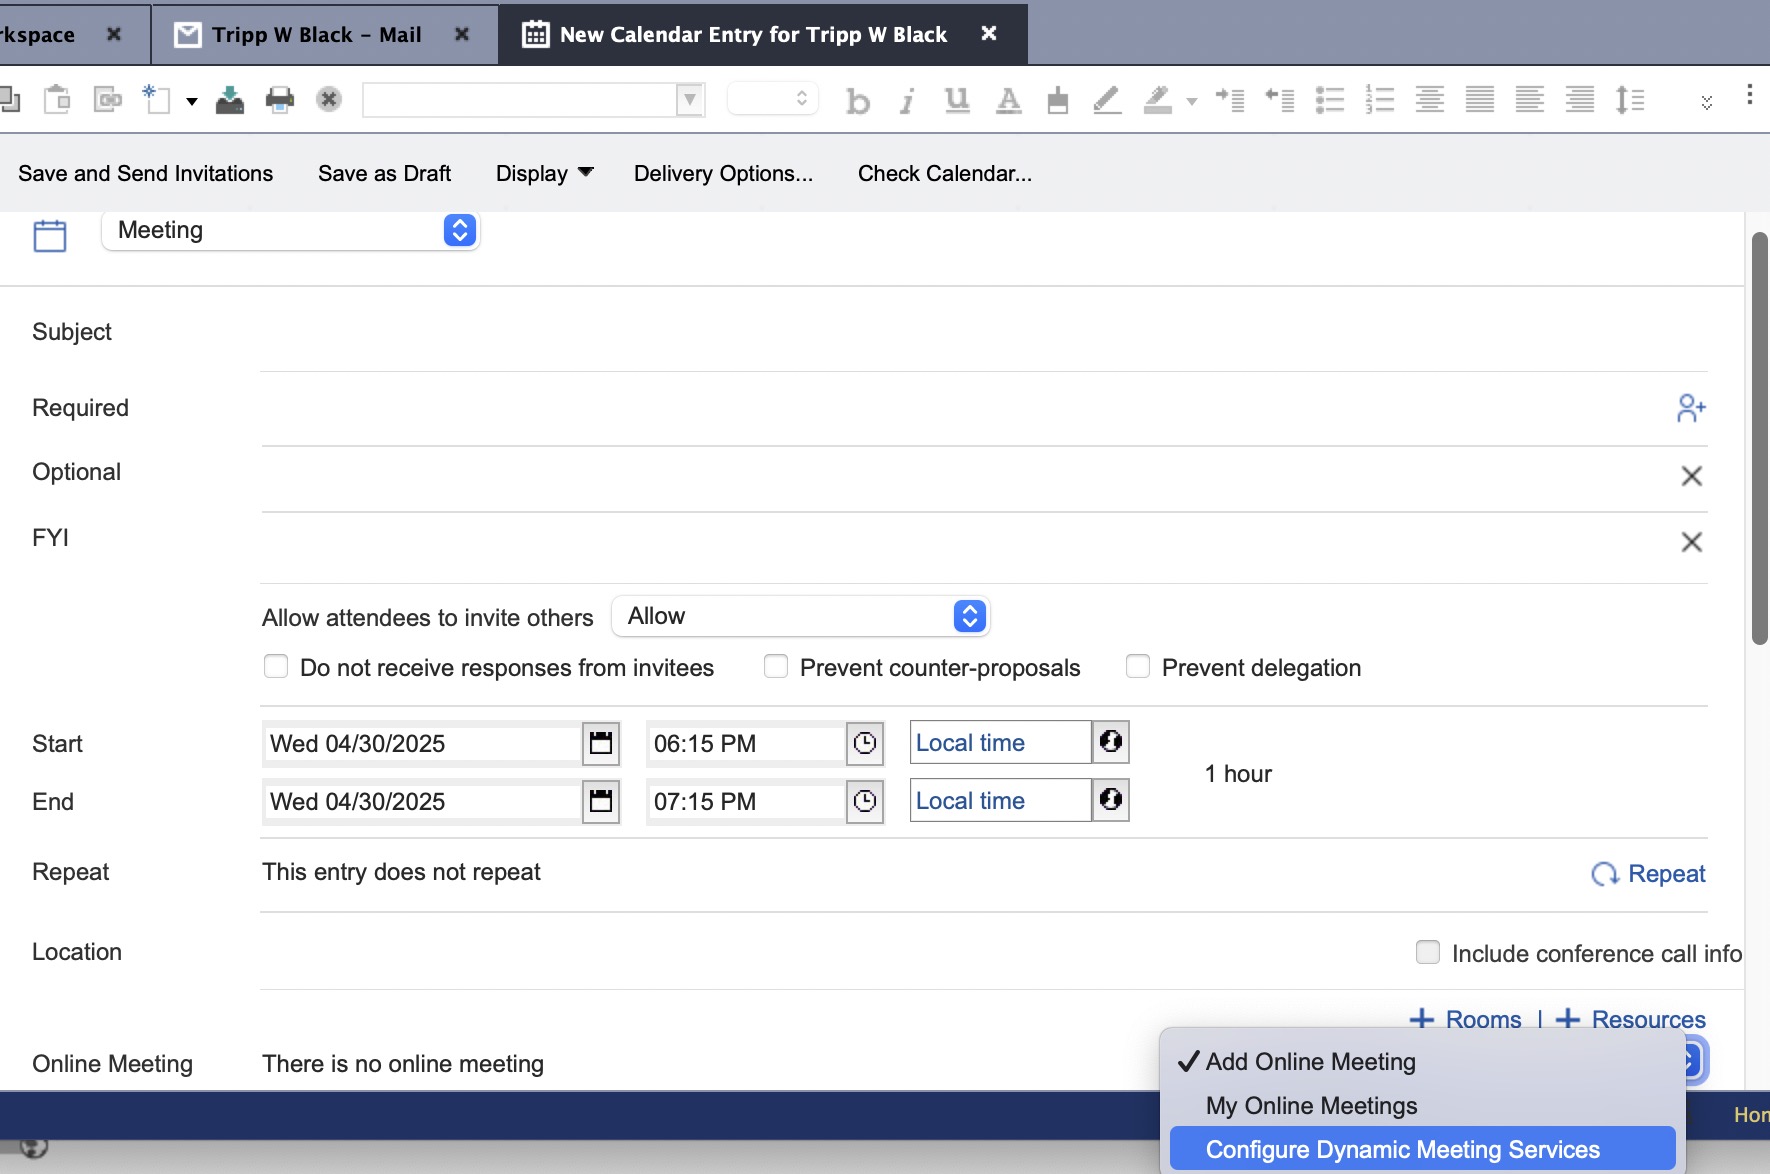
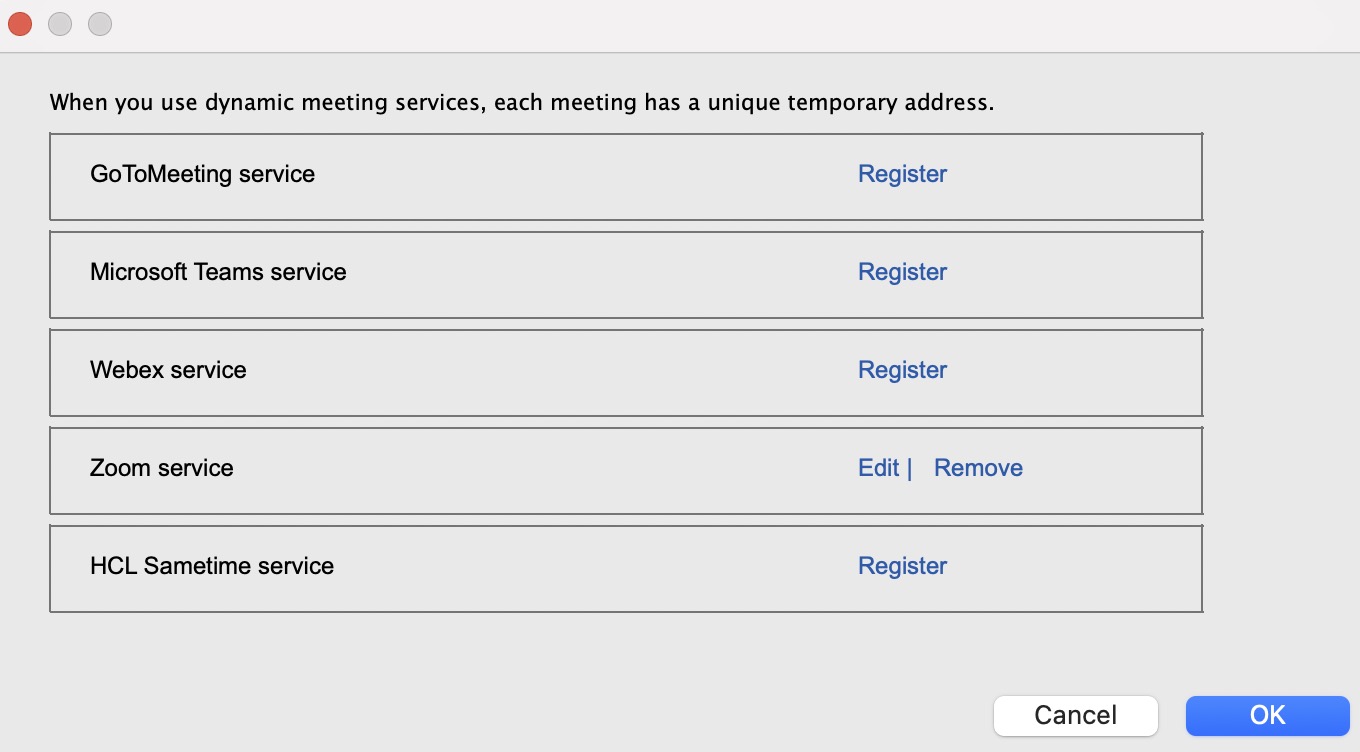
2. In the new Meeting tab, toggle the field showing: Add Online Meeting to Configure Dynamic Meeting Services.
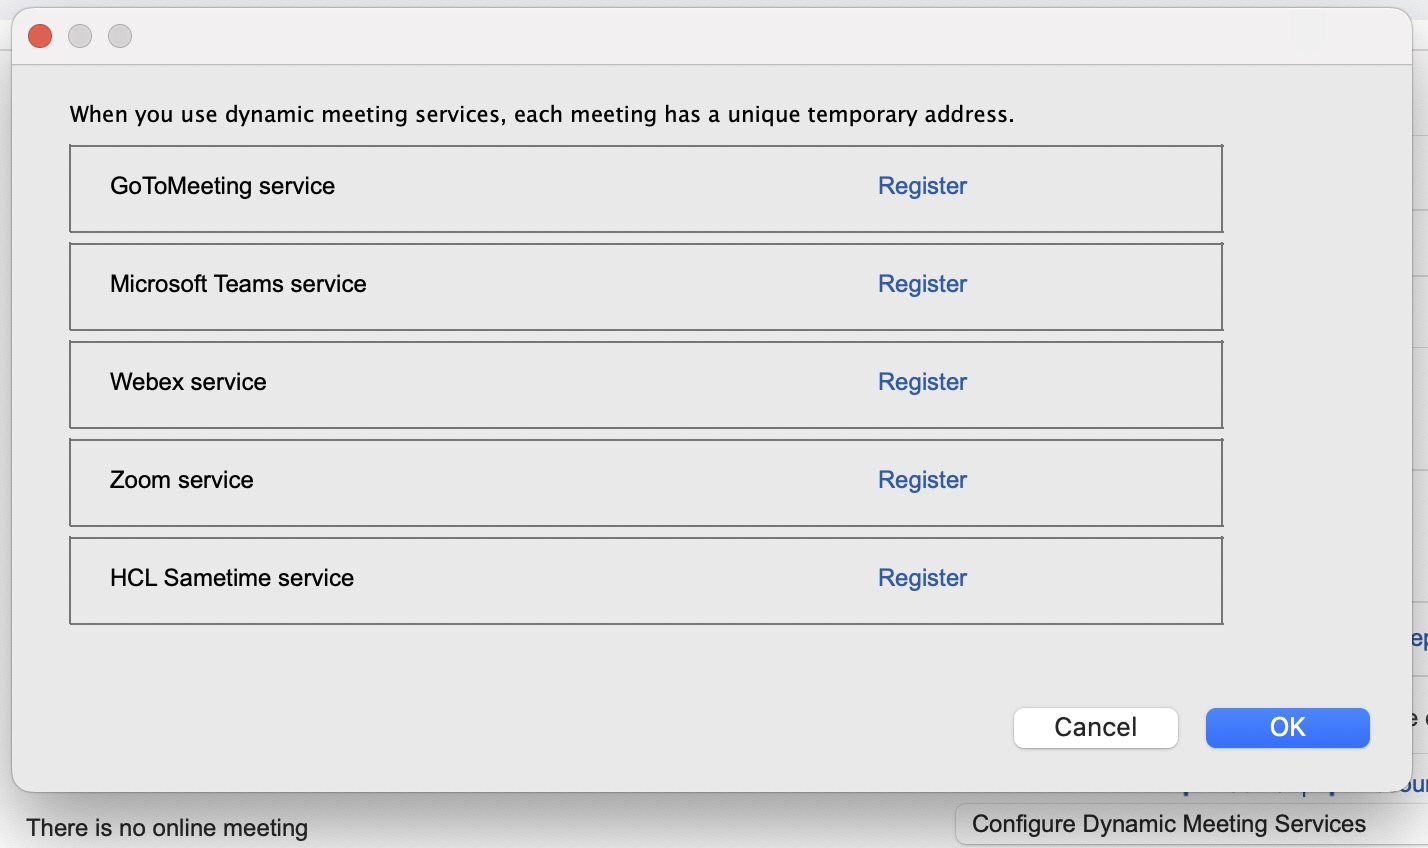
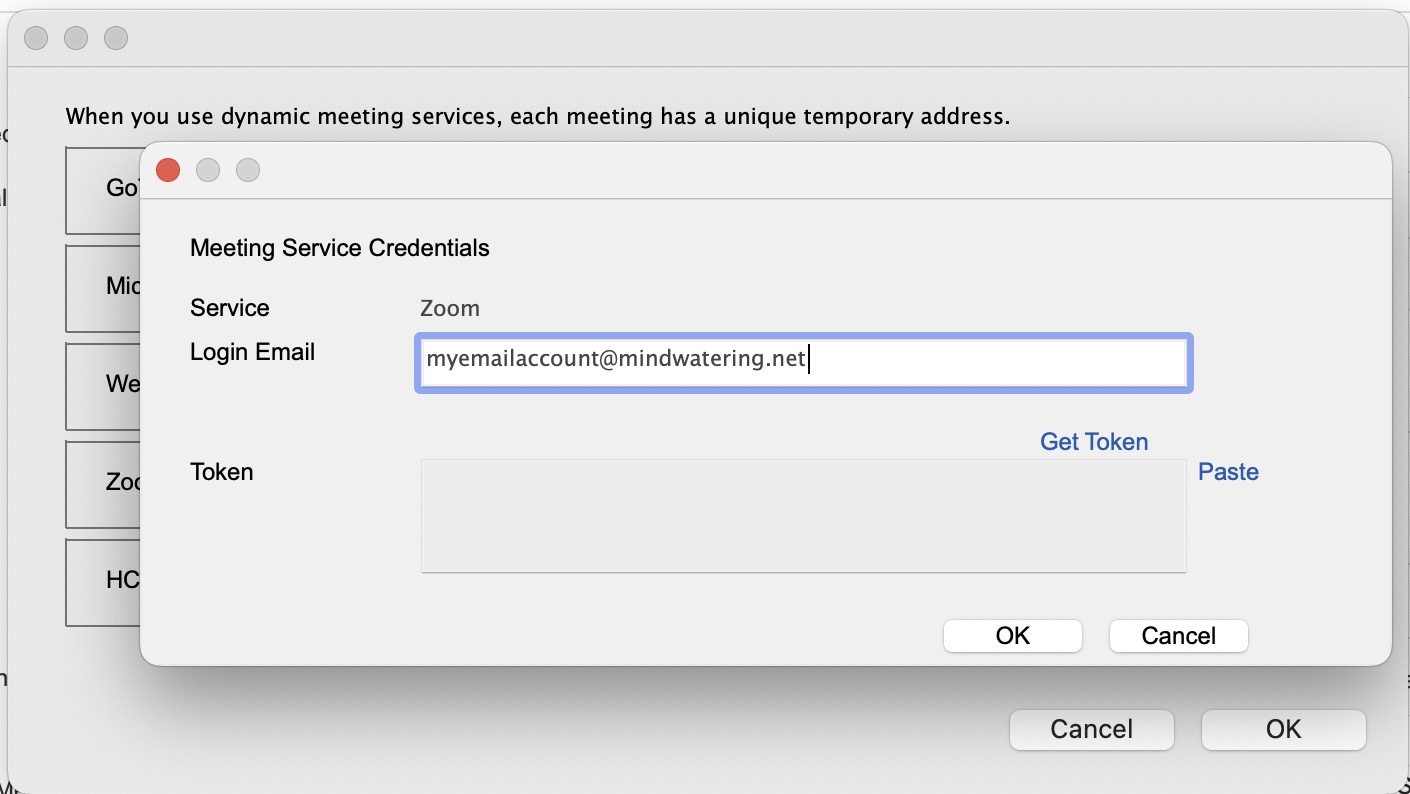
3. In the pop-up Configure Dynamic Meeting Services dialog register for the Zoom service token.
a. Click the Register on the Zoom service row.
b. In the Meeting Service Credentials pop-up dialog, enter the Login Email for the service. Click Get Token.
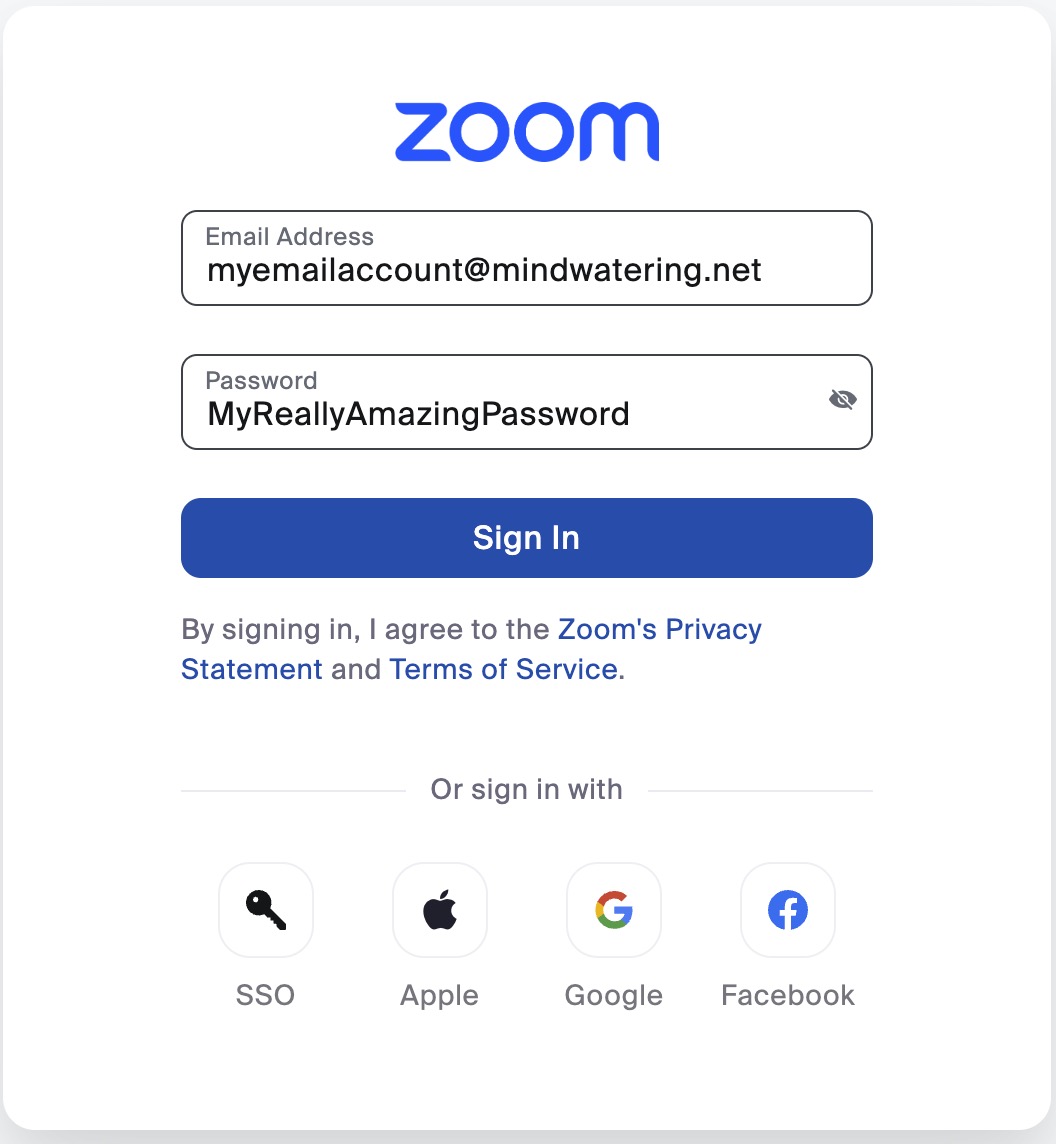
c. Clicking Get Token opens your default web browser to the Zoom Login page.
Enter your Email Address (same one as above) and your Password. Click Sign In.
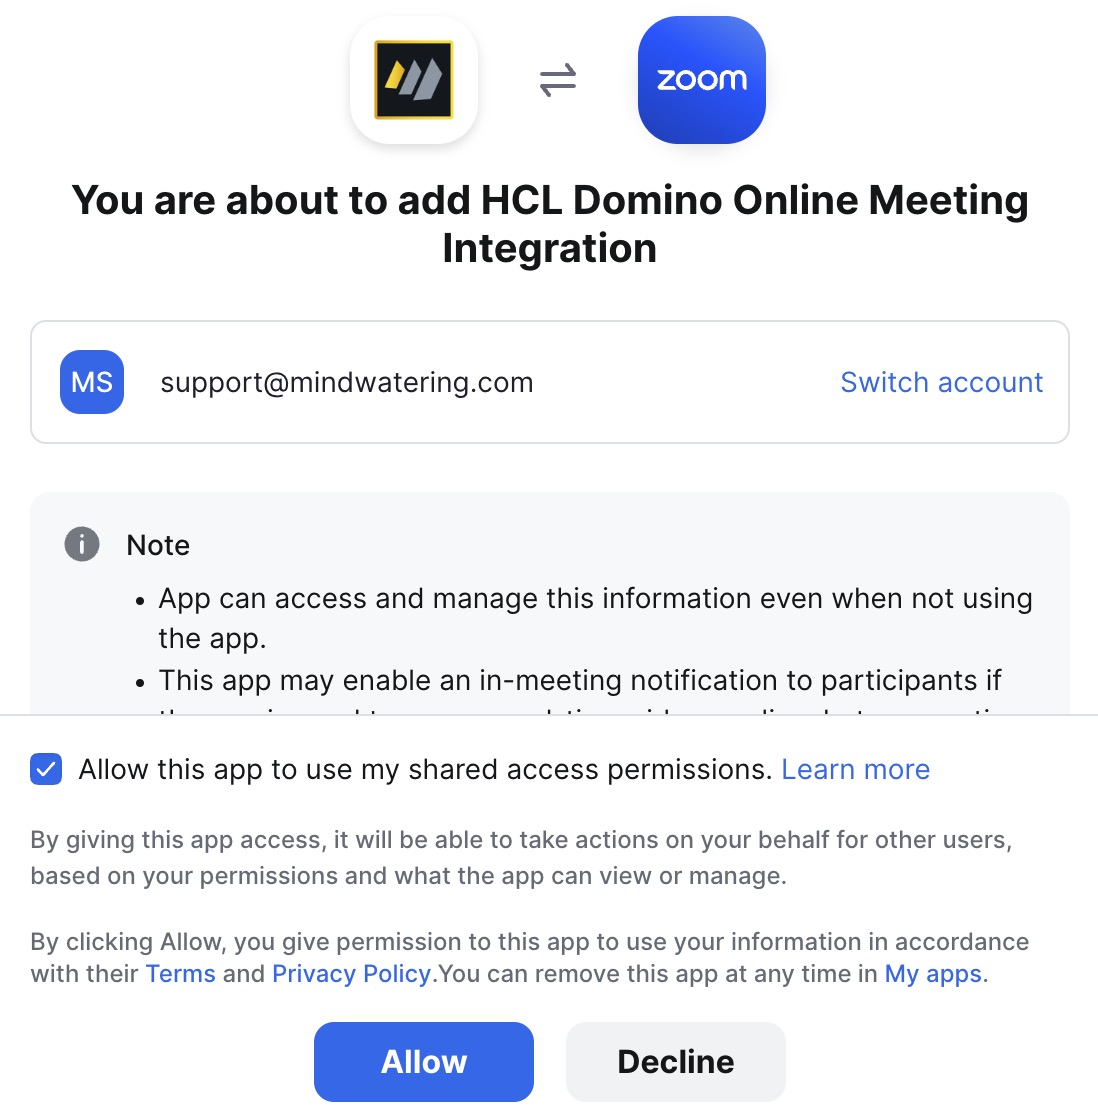
d. In your account settings approve the integration between Notes and Zoom.
Note:
- If you have never done the registration before, the form have a checkbox at the bottom of the page to Allow this app to use my shared access permissions. Click the checkbox, click ALLOW.
- If you previously removed the integration you can re-add it with Add for Myself, like below.

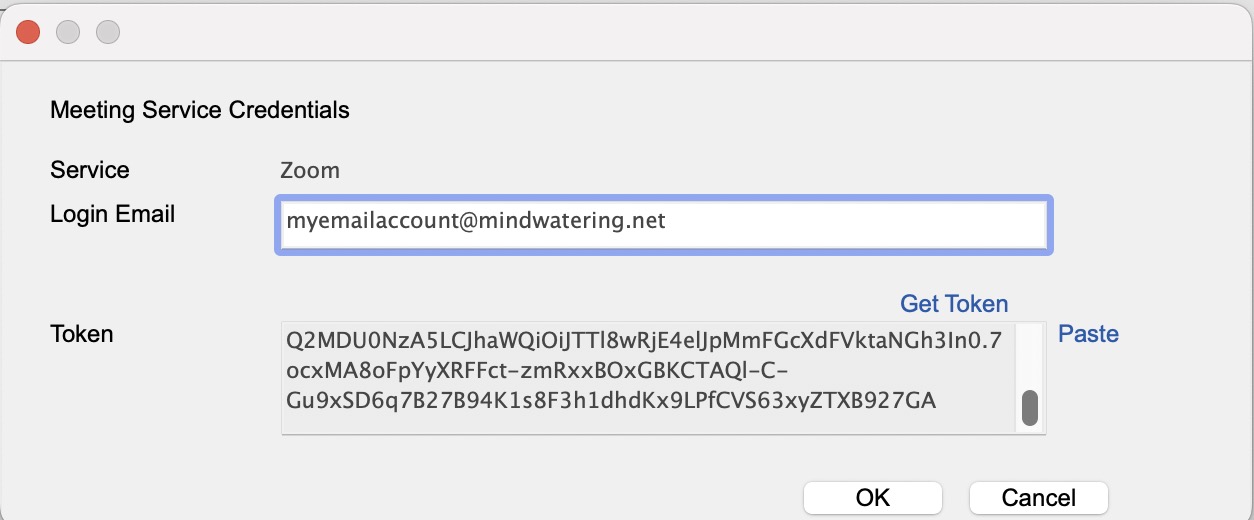
e. On the next page, click the Copy button to copy the token to the clipboard.

f. Back in the Meeting Service Credentials dialog, click the Paste button, and then click OK.
Important:
- The Notes client will created an encrypted entry for each person that are Delegates / Assistant Persons in this mail app's ACL.
- If any are not found, click the Skip option for that missing entry. Because entries had to be skipped, the dialog does NOT automatically update the Zoom service line. However, if you re-open the Configure Dynamic Meeting Services dialog, it will show configuration has been set-up.
Back on the page with the Register options, the Zoom service row/entry will be replaced with Edit | Remove options. Click OK again.
Notes:
- You can Remove the Zoom token access by clicking the Remove option w/in the Configure Dynamic Meeting Services dialog (see above).
- If you run through this Configure on multiple PCs by accident (faster than replication takes place), there will be two Zoom services. To workaround, use the View --> <Ctrl><Shift> Go-To view option to view hidden views, open the duplicate Zoom entry to confirm its the correct one, then click the Delete button with that document highlighted.
- If the Notes client is uninstalled and you wish to clean up the Zoom access, you can also Remove the Zoom token access on this page:
marketplace.zoom.us/user/installed
4. Back in the calendar entry, complete the standard meeting fields.
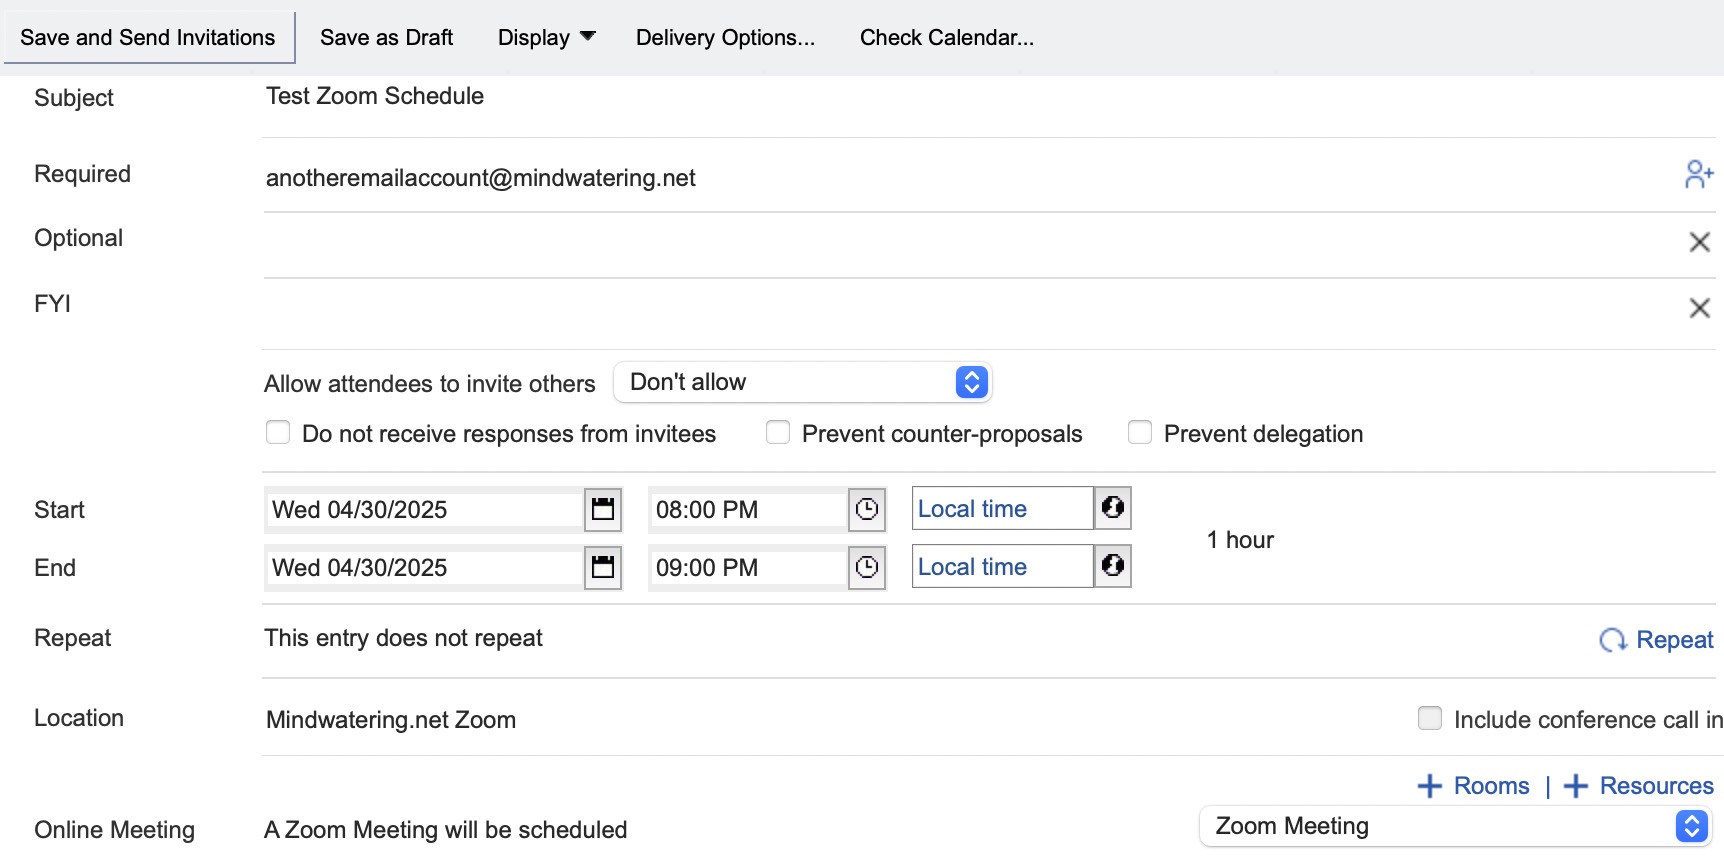
Fields:
- Subject: Test Zoom Schedule
- Required: anotheremailaccount@mindwatering.net
- Start: <today> <onehourfromnow>
- End: <today> <onehourlater>
- Location: Mindwatering.net Zoom (or leave empty - Zoom will to this field the meeting ID and call-in information)
- Online Meeting: Change the Add Online Meeting dropdown to Zoom Meeting
- When done, click Save and Send Invitations.
5. Verify the Zoom meeting integration occurred:
Have the other person open their inbox and accept the meeting. If successful, the meeting will include the Zoom information.
Troubleshooting:
- If we remove and re-add the integration, so to write this tech-note, it creates a duplicate zoom entry in the Online Meeting Credentials view. With two zoom entries, the integration does not work. Delete both, and start over.
- There is an earlier 12.0.2 template which contains a different version of the Online Meeting Credentials form, and two Online Meeting Credentials views (one hidden, one visible). This version of template does NOT work. You have to get the 12.0.2 later template. The KB0103815 HCL technical note has links to the mail12.ntf mail template. We didn't find that KB first, so we created a new VM from a custom VM template with Domino 12.0.2 and the latest FP, that has not yet run setup. We pull the template via SCP. Lastly, stop the replica task on all the Domino servers, and either create a new replica via local Notes client over the server replica, or shut down one of the Domino servers, and SCP it into the /local/notesdata/ folder. Then from the first Domino server, create a replica onto all the servers before re-enabling replication.
previous page
|