Issue:
New person registration fails with error adding ID to ID Vault. The person doc, the ID, and the mail file are all created. The only part not done is the ID Vault component.
Trying to upload the ID (also saved to disk) to the ID Vault has error:
Notes error: Invalid Vault Trust certificate chain. Check the log for details.
The log.nsf and certlog.nsf apps do not contain the error.
However in checking certlog.nsf, we see that the ID vault has an expired date.
Cause:
ID Vault Trust Certificate expire every 10 years by default as per design.
Instructions to Replace/Renew the HCL Domino ID Vault Trust Certificate:
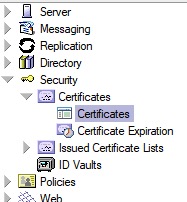
1. Navigate to the server Certificates view.
Domino Administrator Client --> Open the administrative Domino server --> Switch to the Configuration tab --> Open the Security twistie --> Open the Certificates sub twistie --> Open the Certificates view.
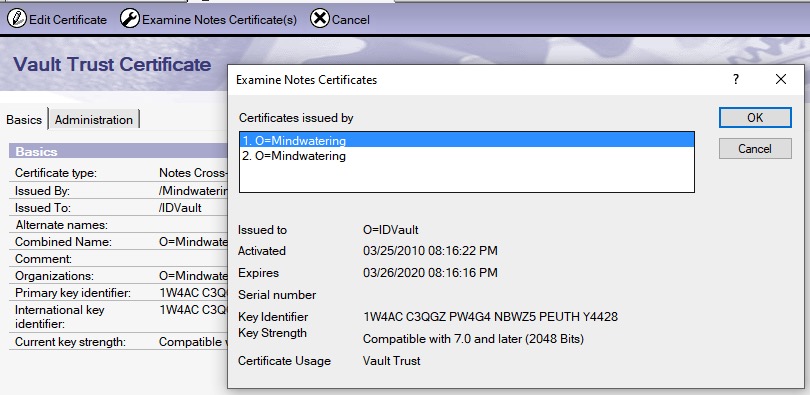
2. Verify the /IDVault document.
- In the Certificate view, navigate under the Vault Trust Certificates category, and open the /IDVault document.
- Click the Examine Notes Certificate(s) button.
- Highlight the certificates and verify the expiration date below.
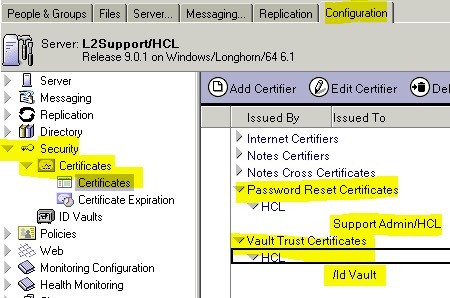
3. Back in the Certificates view,
a. Delete the authorized ID Vault certificate documents for people who administrate the ID Vault. (use the delete keyboard key, not the Delete Certifier button.)
- Password Reset Certificates --> <Organization> --> Issued To (column) <Name> documents.
and
- Vault Trust Certificates --> <Organization> --> /ID Vault document.
Important:
Note the organization under the Vault Trust Certificates category. The organization being deleted now, are the ones that will be added back to the vault. We will re-select/re-add the organization below in step 5 through 6.
Note the names under the Password Reset Certificates category. Those are the same names of the people who manage the ID vault. We will re-select them below in step 5 through 7.
(Image from HCL documentation)
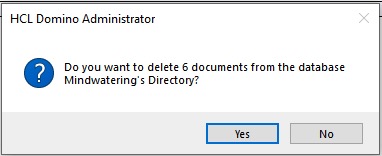
b. Click the delete key next to each one to mark each document with an X. On the top menu, under View, choose Refresh (F9).
Verify the documents selection is only the correct ones.
c. In the deletion confirmation dialog, click Yes to remove those documents selected.
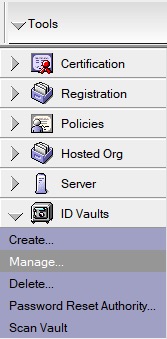
4. Switch to the ID Vaults view, and open the ID Vaults tool on the right.
- On the left, still inside Security menu twistie, click the ID Vaults view.
- Under the tool on the right, Open ID Vaults, and click the Manage button/option.
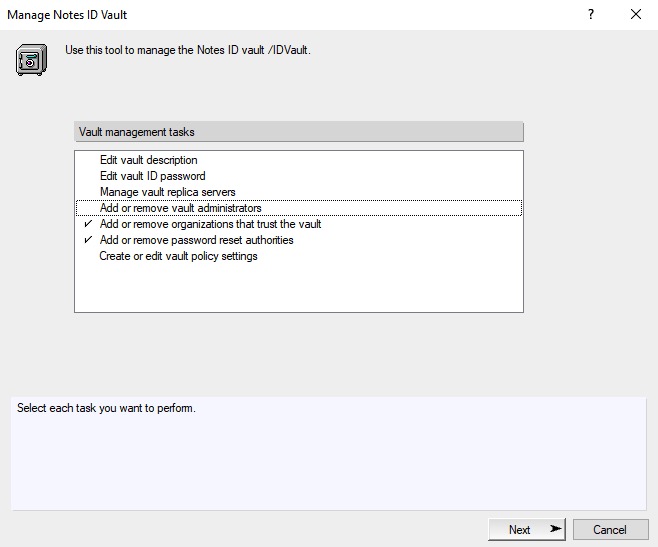
5. In the Manager Notes ID Vault dialog, select the two options:
- Add or remove organizations that trust the vault
- Add or remove password reset authorities
Click Next.
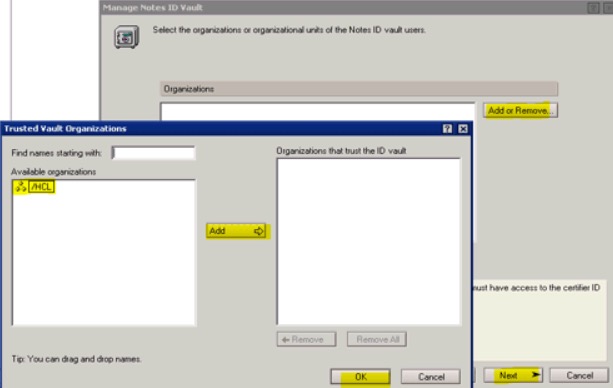
6. In the Trusted Vault Organizations pop-up dialog, select the Organization(s) to be re-added to the ID Vault.
- Highlight the Organization on the left. Click the Add button to add the organization to the right side.
- Click OK to close the dialog.
- Click Next to continue.
(Image from HCL documentation)
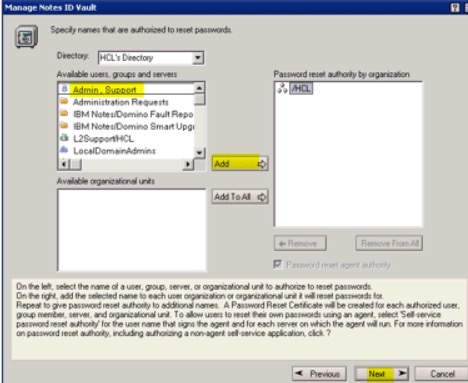
7. In the Manage Notes ID Vault dialog, and the Specify names that are authorized to reset passwords page, add back the authorized folks if they are not already added.
(In our case they did not auto-populate. We add to add them again.)
a. Verify the names on the right that were automatically added.
b. Perform the following:
- If that is correct list, click Next.
or
- If the list is empty (like for us), then:
- - Highlight the target Organization on the right.
- - Click Add to add the names to right side of the dialog. Make sure they are under the correct organization if there are multiple.
- Click Next to continue.
(Image from HCL documentation)
Important:
If your company runs multiple Organizations, make sure the names are added under the correct organization.
8. In the Manage Notes ID dialog, the Vault Management Progress give a review of the organization selected to re-add, and the names to re-add.
- Confirm both are correct and click the Configure button.

(Image from HCL documentation)
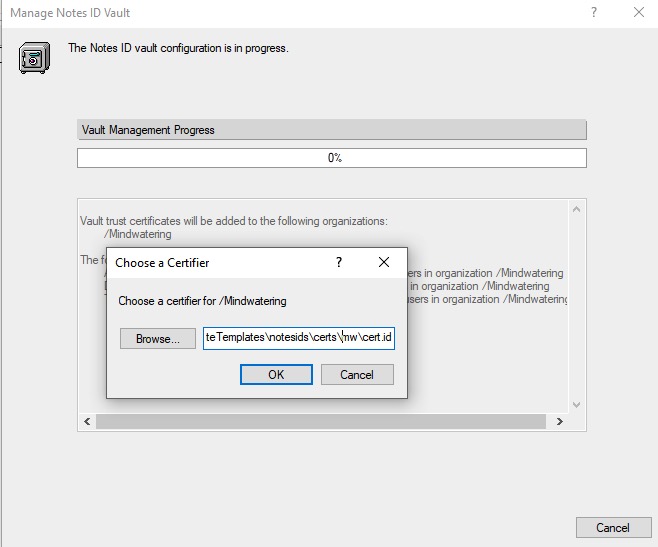
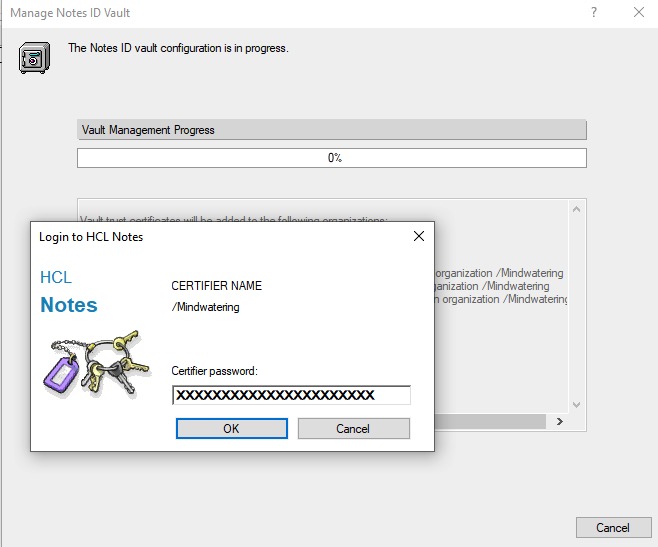
9. In the Manage Notes ID dialog, on the The Notes ID vault configuration is in progress page prompts for the certificate ID file and the password.
- In the Choose a Certifier pop-up, use the Browse button to navigate to the cert.id and click OK.
Note:
This process does not use the CA process. The actual cert.id for the organization must be used.
- In the Login to HCL Notes password dialog, enter the Certifier password. Click OK.
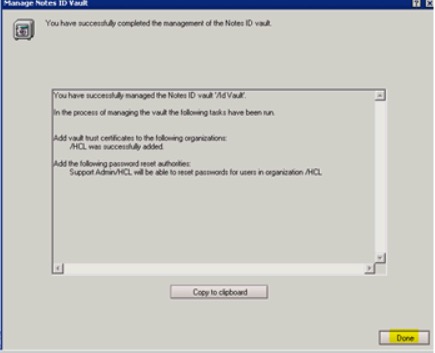
10. In the Manage Notes ID Vault dialog, on the You have successfully completed the management of the Notes ID vault page, click Done.
(Image from HCL documentation)
11. Back in the Certificates view, the new certificates documents can be viewed with the new expiration dates.
previous page
|