Introduction
How to make plane contrails in Blender without using a smoke simulation or particles.
Blender Version:
4.0.x onward.
--------
STEPS
Object Mode
Shift+A -> Mesh -> Cylinder
Go into Edit Mode
Shift+A -> Rotate cylinder 90 degrees and scale down. Drag out ends to elongate.
Ctrl+R -> Add loop cuts and scale until cylinder is a very stretched teardrop shape, with the wider end facing away from the plane
Select vertices at end closest to plane wingtip
Properties -> Vertexes -> Assign new group
Go into Object Mode
Right click -> Shade Smooth
Properties -> Modifiers -> Add Modifier -> Subdivision Surface
- View = 3
- Render = 3
Apply Subdivision Surface
Add Modifier -> Displace
Create new texture
- Name = Contrail
- Direction = Normal
- Strength = .400
- Midlevel = .190
Add Modifier -> Cloth
Properties -> Textures
Select 'contrail' texture
- Type= Clouds
- Clouds Type = Hard
- Size = .70
- Depth = 3
- Contrast = 1.500
Properties -> Physics
- Stiffness Tension = 0
- checkbox Internal Springs
-- Max Spring = 2.500
- Shape Pin Group = Vertex group
- Stiffness = 6
- checkbox Self Collisions
- Field weights Gravity = 0
Select contrail mesh
Shift+A -> Volume -> Empty
Properties -> Modifiers -> Add Modifier -> Mesh to Volume
- Density = 1
- Interior Band Width = .200
- Voxel Amount = 64
Parent the contrail mesh and volume to the plane.
Outliner -> turn off camera and eye icons for contrail mesh so it doesn't render
When plane is moved, the cloth simulator should flex the contrail mesh so that it follows movements of plane. The volume will follow the mesh.
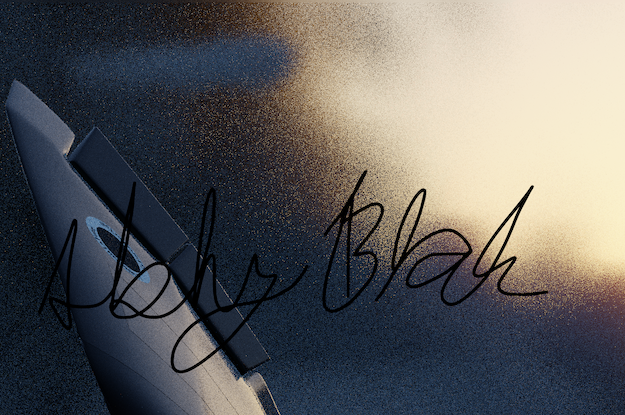
Finished Render
previous page
|